How to Sear Chicken in a Cast Iron Grill Pan
Every cook should know how to make good grilled chicken breasts. It can be tricky because chicken is so lean that it often dries out, becoming rubbery and tough. Prepping your chicken in a simple salt and sugar brine is the perfect solution. The salt tenderizes the meat by breaking down the tough proteins and the sugar adds flavor and helps the browning process. Paired with a hot, cast iron grill pan, this brine guarantees tender, juicy chicken breasts that will add texture and flavor to any dish.
Let’s get started!
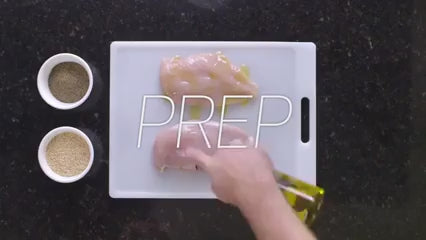
Prep
Dissolve 1 tablespoon of salt and 2 tablespoons of sugar in 2 cups of room temperature water for the brine. Stir the mixture until the salt and sugar dissolve. Soak your chicken for 30 to 60 minutes in the refrigerator. Any longer, and your chicken may be too salty. Pat dry to remove excess moisture and promote browning. Apply the oil and spices of your choice to your chicken. We like garlic and pepper. Rub your spices in.
Heat
Preheat your oven to 350°F. Heat your grill pan to medium-high heat for 5-7 minutes. Splash your pan with a few drops of water—if it sizzles and vanishes when it hits your pan, you’re at the right temperature.
Sear
Brush oil onto the pan. We like to use canola oil because of its high smoke point. Sear your chicken for 2 minutes. Remember to space the chicken breasts out. When proteins are cooked too closely together, they will steam rather than sear. Your chicken is ready to flip when the breast has turned white half way up the side. If your chicken is still clinging to the skillet, give it another minute. When your chicken easily releases from the pan, flip, sear for 2 more minutes, remove your pan from heat.
Tip: You can add 2 ice cubes to your pan to lower the temperature of the pan subtly and prevent your chicken from overcooking.
Bake
Bake for 18 to 20 minutes or until the chicken reaches an internal temperature of 165°F.
Rest
For the perfect chicken, let it rest for 5 minutes. Sit tight—allowing the chicken to rest will redistribute the moisture and keep all of those flavorful juices intact when you slice into it at the dinner table.
More tips for a great cast iron chicken:
- Oil:
- We like to use canola oil because of its high smoke point. If you don’t have it on hand, we recommend trying avocado oil, vegetable oil, or a light olive oil. For more info on choosing the right oil, check out our article, “Oils for Cast Iron Cooking and Seasoning.”
- Seasoning:
- Simply brining and seasoning your chicken will yield delicious results, but you can step up your game by adding crushed garlic, fresh herbs, and a tablespoon or two of butter just before transferring your skillet to the oven for a simple and delicious pan sauce. If you want to dress it up, deglaze your skillet with a few tablespoons of white wine or chicken broth and mix in a dollop of sour cream, greek yogurt, or dijon mustard. Spoon the sauce over the chicken just before serving.
- Temperature:
- For food safety reasons, chicken should always be cooked to an internal temperature of 165°F. Take the guesswork out of the equation and invest in an instant read thermometer.